
How Do I Remove Scratches From a Motorcycle Helmet Visor?

How Do I Remove Scratches From a Motorcycle Helmet Visor?
Most visor scratches fall into two groups: light surface marks that can be gently reduced, and deeper scratches or coating damage that no polish can fix safely. Clean the visor first, test a very mild polish on a small area, and replace the visor whenever the mark stays in your line of sight or changes what you see.
Light surface scratches can sometimes be reduced with careful cleaning and a mild plastic polish. Deep scratches, coating damage, or any distortion mean the visor should be replaced. Skip toothpaste, sandpaper, and household abrasives near your line of sight.
This guide follows the care guidance published by helmet maker Airoh, which recommends cleaning visors with neutral soap, a damp non-abrasive cloth, and a soft microfiber drying cloth, and removing the visor for thorough cleaning. Polishing advice beyond that guidance is a practical rider check, not a manufacturer guarantee.
Find Out What Kind of Mark You Have
The fix depends on the depth, not the length. A light scratch from wiping dust across the visor sits in the top layer and may respond to gentle polishing. A groove that catches your fingernail, a white line that bends when light hits it, or a hazy patch after something chemical touched the surface is a different problem.
Take the visor off the helmet and look at it under a bright lamp at an angle. Rotate it slowly. Scratches in the middle of your field of view matter more than marks near the edge, and damage that sits between you and oncoming traffic deserves the strictest test.
Run a clean fingernail across the mark. If it catches, the scratch is deeper than a surface haze and polishing will not remove it.
Why Most Quick Fixes Make It Worse
Toothpaste is the classic internet fix, and it is also the easiest way to turn one scratch into a cloudy patch. Toothpaste contains fine abrasives that may remove a coating or leave a matte smear on plastic. Dry wiping, glass cleaner, and rubbing compounds do the same thing in different ways.
Helmet makers are consistent about the safe baseline: use neutral soap on a damp, non-abrasive cloth, then dry with a soft microfiber cloth. Airoh also warns against cleaning while wearing gloves, because glove seams and residue can scratch the surface. If your vision is impaired mid-ride, stop somewhere safe before touching the visor.
| What Riders Try | Why It Can Backfire | Safer Alternative |
|---|---|---|
| Toothpaste | Fine abrasives haze plastic or strip coatings | Neutral soap and a microfiber cloth |
| Glass cleaner | Chemicals can attack visor coatings | Water rinse, then lens-safe cleaner |
| Dry wiping with a sleeve | Grit grinds into the surface | Rinse first, then wipe |
| Car rubbing compound | Too aggressive for thin visor plastic | Mild plastic polish on a small test area |
The Only Approach Worth Trying at Home
- Remove the visor following your helmet's instructions so you can work on a flat, stable surface.
- Rinse both sides with clean water to wash away dust and grit before anything touches the plastic.
- Clean with neutral soap and a soft microfiber cloth, then dry completely.
- Test a plastic polish designed for clear plastics on the edge or inside of the visor first.
- Work the polish in slow circular motions with light pressure, then wipe off and check under light.
- If the haze spreads or the mark stays, stop. Do not repeat with stronger compounds.
This only makes sense for surface marks on an uncoated or lightly coated visor. Many modern visors carry anti-scratch or anti-fog coatings, and aggressive polishing can strip them, leaving a visor that looks clean but fogs or scratches faster afterward.
When Polishing Is the Wrong Answer
Replace the visor when the scratch catches your fingernail, when light bends or distorts around the mark, when the coating is peeling, or when the visor has taken any real impact. A visor is not a structural safety part the way the shell and liner are, but it is the layer between your eyes and the road. Blur, glare, and distortion make riding harder at exactly the moments you need to see clearly.
Check whether replacement visors are available for the model before you spend time polishing. If the helmet is old or the model is discontinued, a scratched visor can be the reason the whole helmet needs replacing.
Representative Rider Scenario: Sam - One Bad Wipe. Sam wiped a dusty visor with his sleeve at a gas station and spent the weekend trying toothpaste and car wax. By Sunday the haze covered more than the original scratch. A replacement visor for his helmet model solved the problem in minutes.
Coating damage deserves its own category. A visor with an anti-scratch or anti-fog layer can start peeling near the edges or in the center after harsh cleaning or years of use. Peeling is not a scratch, and no polish puts that layer back. The visible test is simple: if light scatters around the damaged area and the coating edge is raised, the visor is past the point of repair.
Keeping the Visor Scratch-Free Longer
Most scratches arrive in three ways: wiping dry dust, resting the helmet face-down, and cleaning with the wrong cloth. Rinse with water before wiping, use a dedicated microfiber cloth, and never let the visor touch concrete, keys, or the tail of a jacket zipper.
When the helmet is off, carry it face-up or use a bag with a soft liner. Store a spare visor away from the helmet, not stacked against other gear.
One more habit pays off: remove the visor when you clean the shell. Cleaning around the visor with polish or spray leaves residue on the seal and the pivot area, and wiping it off while the visor is mounted presses particles into the surface. Taking the visor off turns a risky ten-second wipe into a safe two-minute job.
How This Applies When Choosing
A visor you can remove and refit easily makes inspection, cleaning, and replacement practical for everyday riders. If a scratch cannot be polished out, the next question is how hard it is to swap the visor on your actual helmet model.
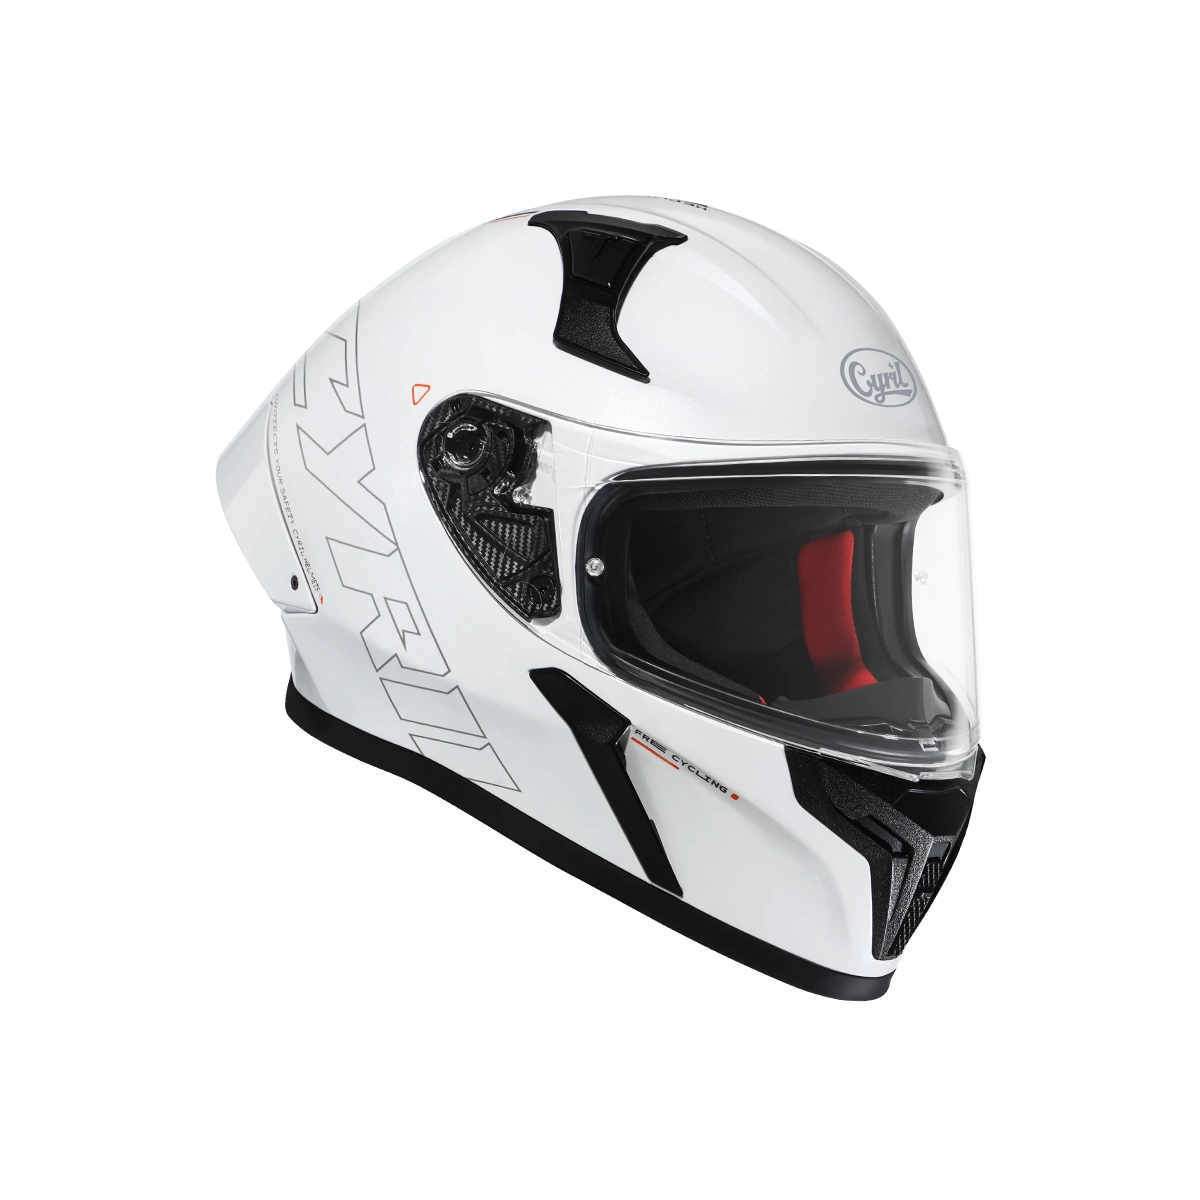
A Clear Visor With a Quick-Release Base
The Mad Shark FF357 page lists a clear visor and a quick-release visor base. That combination makes the checks above practical: remove the visor, inspect it, and replace it without tools when a scratch cannot be fixed.
View current Mad Shark FF357 detailsCommon Questions About Scratched Visors
Can toothpaste remove scratches from a helmet visor?
Not safely. Toothpaste is abrasive and can haze the plastic or strip the coating, making the visor worse.
Do visor scratches affect safety?
They can reduce clarity and increase glare. If a scratch distorts your view or sits in your line of sight, replace the visor.
Can I polish a coated visor?
Usually not. Aggressive polish can remove anti-scratch or anti-fog coatings, leaving the visor more vulnerable afterward.
How do I know if a scratch is too deep?
Run a clean fingernail across it. If the nail catches, the scratch is deeper than surface haze and will not polish out.
What is the best way to clean a visor without scratching it?
Rinse with water, clean with neutral soap on a soft cloth, and dry with a clean microfiber cloth. Never wipe dry dust.
Can car polish fix a scratched visor?
A mild plastic polish may reduce light surface marks, but wax-heavy car compounds can smear. Test on a small area first.
When should I replace the visor instead of polishing?
When the scratch catches your fingernail, the coating is peeling, the view distorts, or the visor has taken any impact.
How should I store a spare visor?
Keep it in a soft bag, face-up and away from other gear, in a dry place out of direct sunlight.
Final Notes
Start with a clean visor and a realistic test. If a light surface mark improves with a gentle polish, fine. If the mark stays in your line of sight or distorts light, stop polishing and check whether a replacement visor is available for your helmet.